Category: Industry Insights

  • How to Prepare 3D CAD Files for Ceramic Manufacturing: Slip Casting vs. Roller Forming DFM Guide

    How to Prepare 3D CAD Files for Ceramic Manufacturing: Slip Casting vs. Roller Forming DFM Guide

    Every week our engineering desk receives the same email: “Here is our STEP file — it is production-ready, we already had it molded in ABS.” Three weeks later the samples come back cracked at the handle root, the lid no longer fits, or the wall reads 3.1 mm instead of the intended 4.0 mm. Nothing was wrong with the CAD. What was wrong was the assumption that a 3D model optimized for injection molding or CNC machining can be dropped straight into a ceramic process.

    Ceramic is not a polymer and not a metal. The body starts as a water-based clay mass, loses 6%–8% of its linear dimension while drying, then collapses a further 13%–15% as it vitrifies at 1310°C. It is formed inside a porous gypsum mold that must be opened by hand, it shrinks non-uniformly if wall sections are unbalanced, and it will tear itself apart if a thick section is locked between two thin ones. This guide is the DFM checklist we send to designers before a single mold is cut — written from the shop floor of a Dehua source factory, not from a textbook.

    1. The Four Failure Modes of “Injection-Molding-Ready” CAD in Ceramics

    Before correcting geometry, understand what actually breaks:

    • Kiln distortion (warp & sag). Uneven wall thickness creates differential shrinkage. A 9 mm base under a 3 mm rim will pull the floor into a bowl shape during vitrification. Ceramic has no packing pressure to hold the shape — gravity and shrinkage do the shaping.
    • Drying and firing cracks. Sharp internal corners, abrupt section changes, and trapped thick junctions concentrate stress. The part cracks at the exact place where the CAD looked cleanest.
    • Release failure (sticking / tearing). Zero draft, soft undercuts and textured vertical walls lock the green body into the plaster mold. The piece either tears on demold or the mold is destroyed extracting it.
    • Dimensional mismatch after firing. Lids, threads, stackable feet, silicone lids and coaster recesses designed at nominal size will be 19%–22% too small after the kiln. Mating features must be compensated, not scaled blindly.

    2. Shrinkage Data You Must Design Around (Verified Numbers)

    This is the single most consequential number in ceramic DFM. Our production data for Dehua bodies:

    Body Firing temperature Drying shrinkage Firing (vitrification) shrinkage Total linear shrinkage
    High-Fire White Porcelain (Dehua) 1310°C 6% – 8% 13% – 15% 19% – 22%
    Mid-Fire Stoneware 1260°C – 1280°C 5% – 7% 11% – 12% 16% – 18%

    Two practical consequences:

    1. A mug designed at 90 mm green height in high-fire porcelain lands at roughly 70–73 mm after firing. If your target is 90 mm fired, the master model must be built at about 111–115 mm.
    2. Shrinkage is not perfectly isotropic. Slip-cast walls shrink slightly more across the thickness than along the length because the mold extracts water from one face first. Expect 0.5%–1.5% directional variance, which is why we fire a 100 mm shrinkage bar from every new body lot and adjust the master mold rather than trusting a catalogue value.

    Body choice changes the whole tolerance chain — see our comparison of high-fire porcelain at 1310°C vs. mid-fire stoneware for custom cafe mugs before locking a fired dimension.

    2.1 Scaling Compensation Formula

    Compensation is a uniform inverse scale applied to the fired target model to produce the master/green model:

    Scale factor = 1 / (1 − S), where S is total linear shrinkage.

    Total shrinkage S Scale factor 90.0 mm fired target → master size
    16% 1.190 107.1 mm
    17% 1.205 108.4 mm
    18% 1.220 109.8 mm
    19% 1.235 111.1 mm
    20% 1.250 112.5 mm
    21% 1.266 113.9 mm
    22% 1.282 115.4 mm

    2.2 How to Apply the Scale in Rhino / SolidWorks / Fusion 360

    Rhino: keep the client-facing model at fired size and work on a separate layer or file for the master. Use Scale3D with the model centroid or a defined datum as the base point, and set the scale factor to 1/(1−S). Never scale with “Copy=No” on the only file — keep both states. Record the factor in the file name (e.g. MUG-1140_master_x1.250) so the mold shop cannot use the wrong version.

    SolidWorks: use Insert > Features > Scale with uniform scaling about the centroid, driven by a global variable or equation (for example “ScaleFactor” = 1.25). Because it is a feature in the tree, you can suppress it to return to fired size instantly and re-export the client view.

    Fusion 360: use Modify > Scale, Uniform, with the body origin as the point, and drive the factor from a user parameter. Also verify that fillets and shell thickness survive the scale — uniform scaling multiplies wall thickness too, so a 3.6 mm wall becomes 4.5 mm at 1.25×, which is usually exactly what you want. If you compensated only one axis, re-check fillets manually.

    Critical rule: compensate the model, never the drawing. The 2D drawing must state both sizes — fired target ±tolerance, and master size with the applied factor — or the first article inspection will be measured against the wrong reference.

    3. Slip Casting vs. Roller Forming: Two Different CAD Problems

    These are not interchangeable processes with different costs. They impose different geometric rules, and choosing the wrong one for a shape is the most expensive mistake in ceramic OEM.

    DFM dimension Slip Casting (水泥注浆成型) Roller Forming / Jiggering (滚压成型)
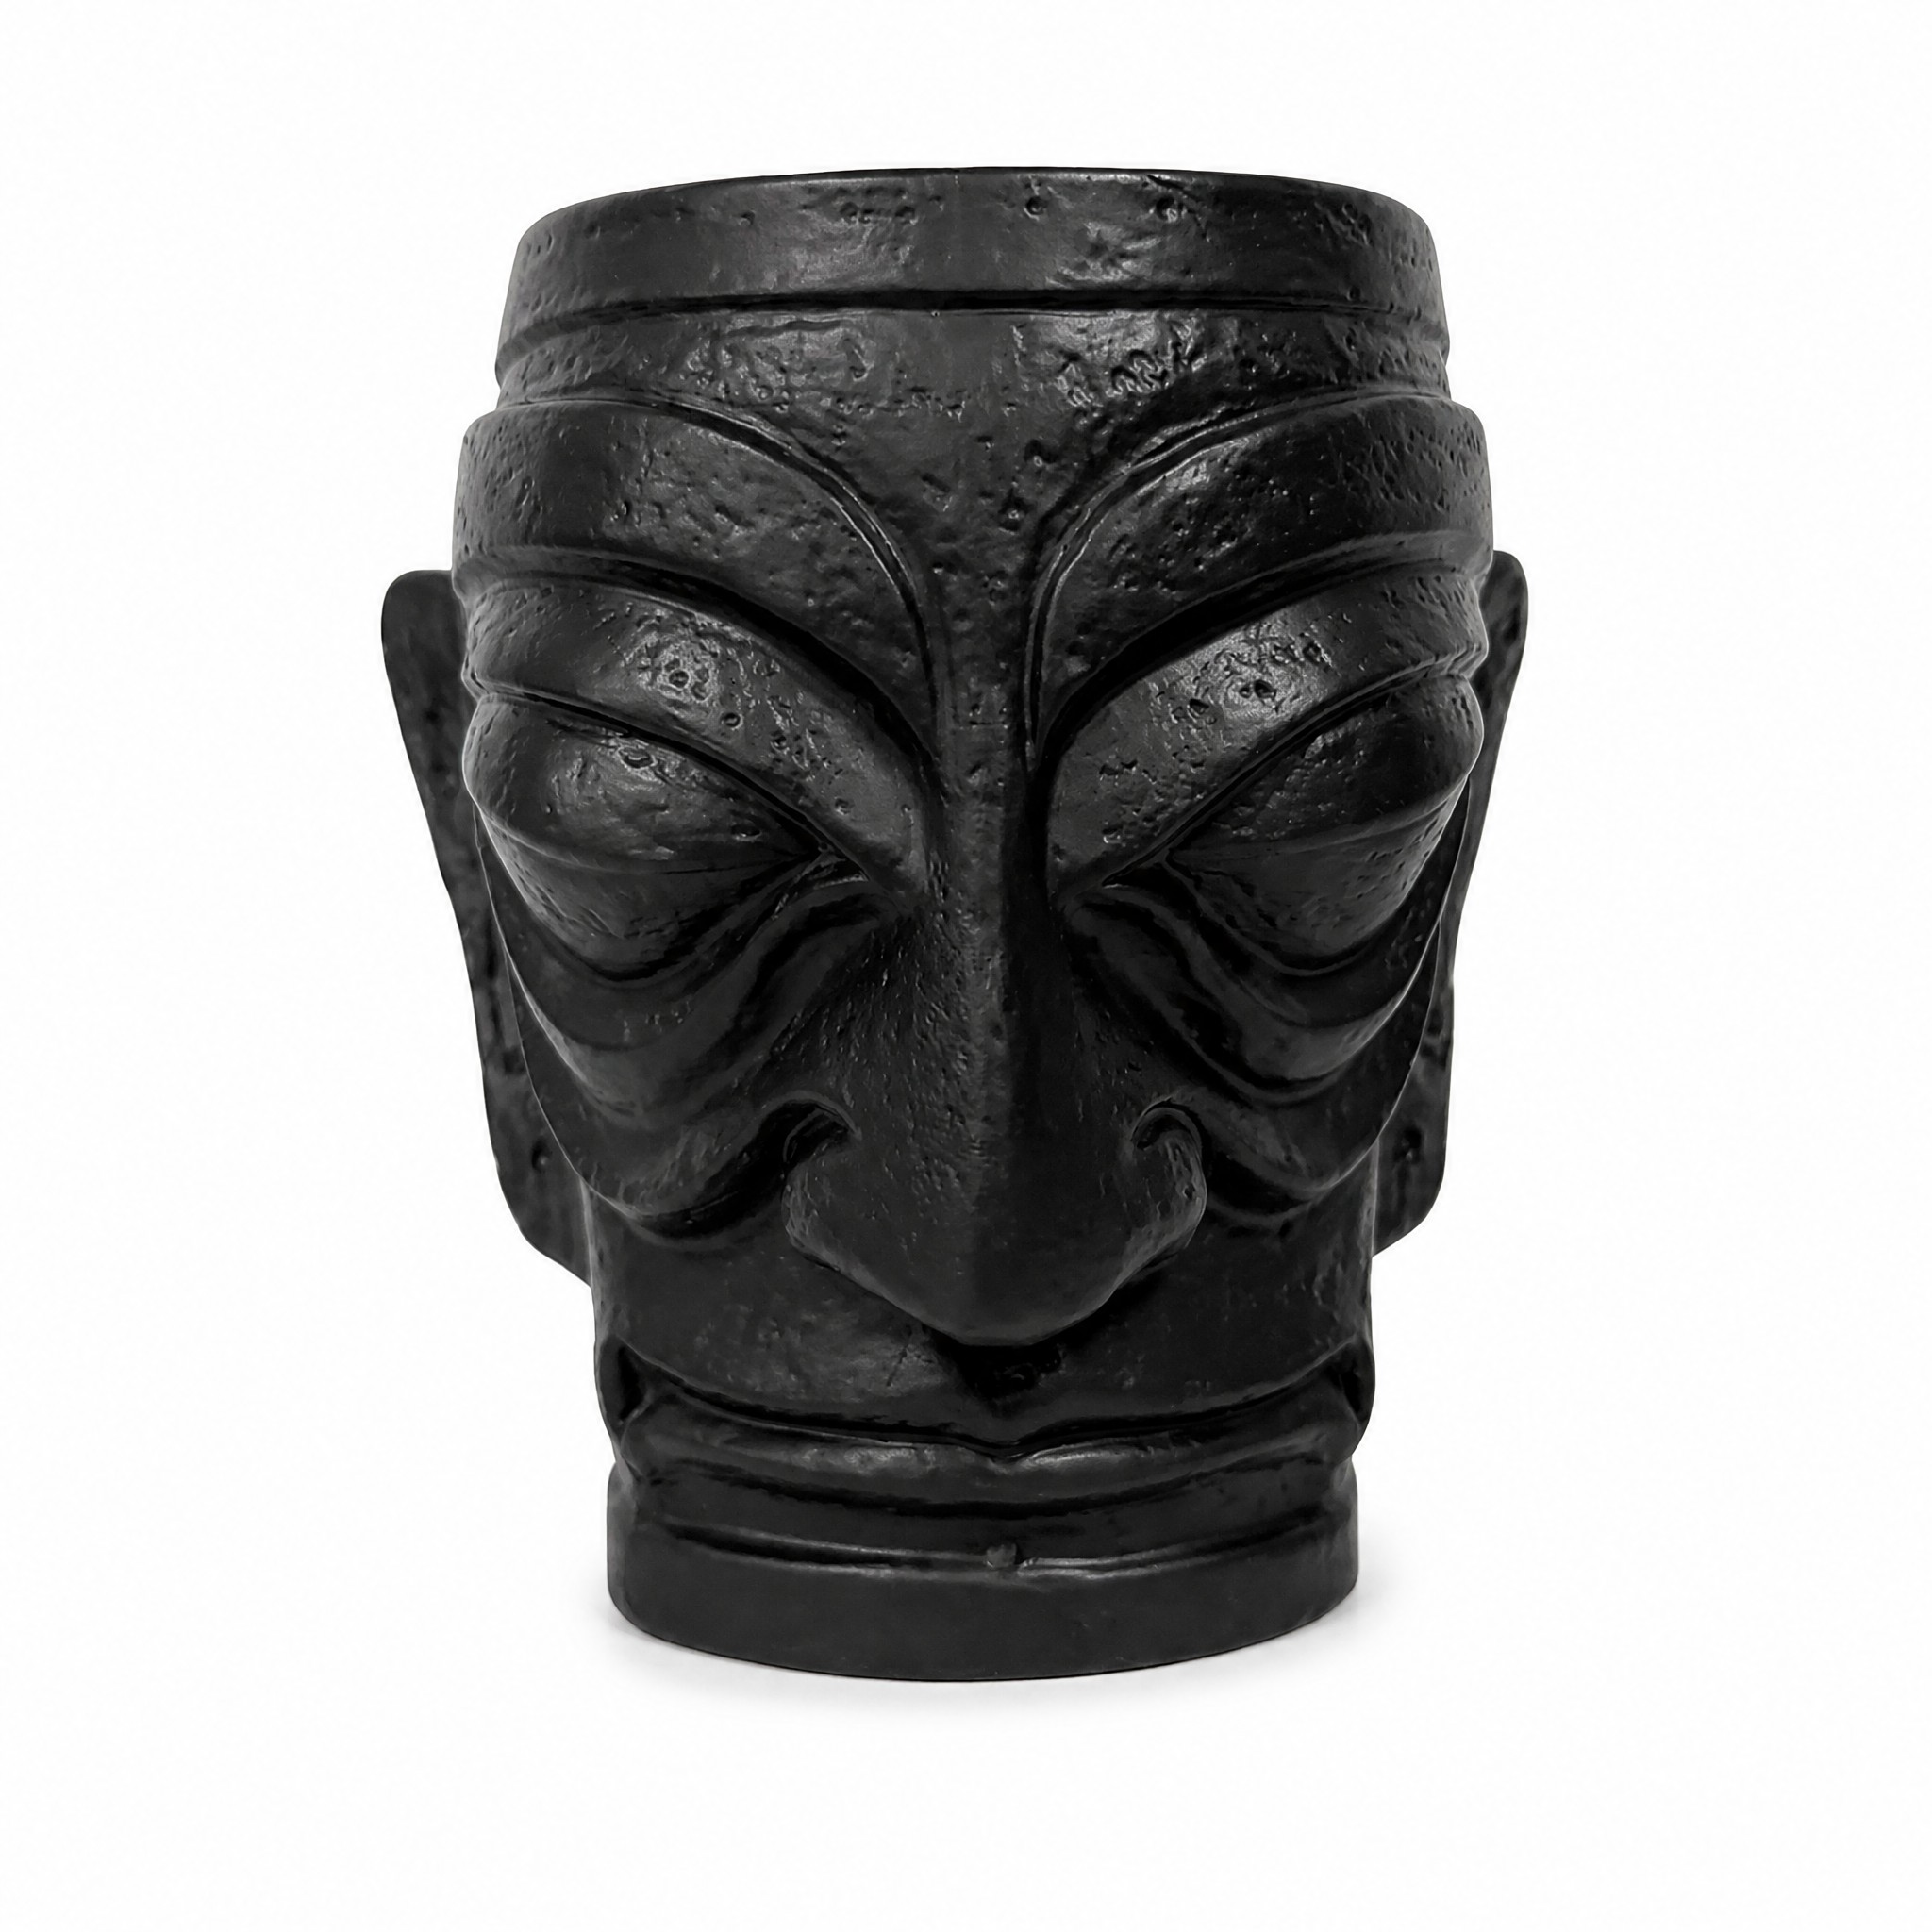
    Geometric freedom Very high. Free-form organic sculpture, 3D relief, Tiki mugs, animal and character mugs, hollow handles, asymmetric profiles and sculpted lids are all routine. Multi-part molds release true undercuts. Strictly axisymmetric. Circular plates, standard round cups, round bowls, conical or bell profiles. Any non-round section, handle, or sculptural relief must be added as a separate cast or hand-applied part.
    Mold format Multi-piece plaster absorption mold, typically 2–4 parts (up to 6 for complex sculpture), with keys, straps and a pour gate. Each mold produces a limited number of cycles before the plaster saturates. Single-cavity plaster mold (or plaster head/jigger profile) plus a rotating metal or plaster forming head/profiler that presses the clay against the spinning mold.
    Clay body & density Liquid slip at roughly 1.65–1.80 g/cm³, deflocculated, cast by capillary water absorption into the plaster. Density depends on casting time and wall build-up. High-plasticity vacuum-pugged clay slugs (de-aired), mechanically pressed and thinned by the roller. Higher and more uniform green density, fewer pinholes, better mechanical strength.
    Wall thickness control Controlled by dwell time, not by the model. Achievable 3.5–6 mm, tolerance typically ±0.4–0.6 mm. Variation between mold halves is normal; wall must be designed with margin. Controlled by the gap between profiler and mold — highly repeatable, tolerance typically ±0.2–0.3 mm. Excellent for thin, even rims and tight fired capacities.
    Production rhythm Slow: pour, dwell, drain, set, demold, fettle. Labor-heavy, batch-based, mold-bound. Best for low-to-mid volume and high complexity (economical from 500 pcs). Fast: seconds per piece on a turntable, one operator per station. Lowest unit cost at volume for round ware; tooling amortizes quickly above a few thousand pieces.
    Typical applications Character mugs, sculptural vessels, relief-tile patterns, hollow handles, hotel amenity sets with complex silhouettes. Standard cafe mugs, plates, bowls, ramekins, stackable dinnerware, high-volume promotional drinkware.

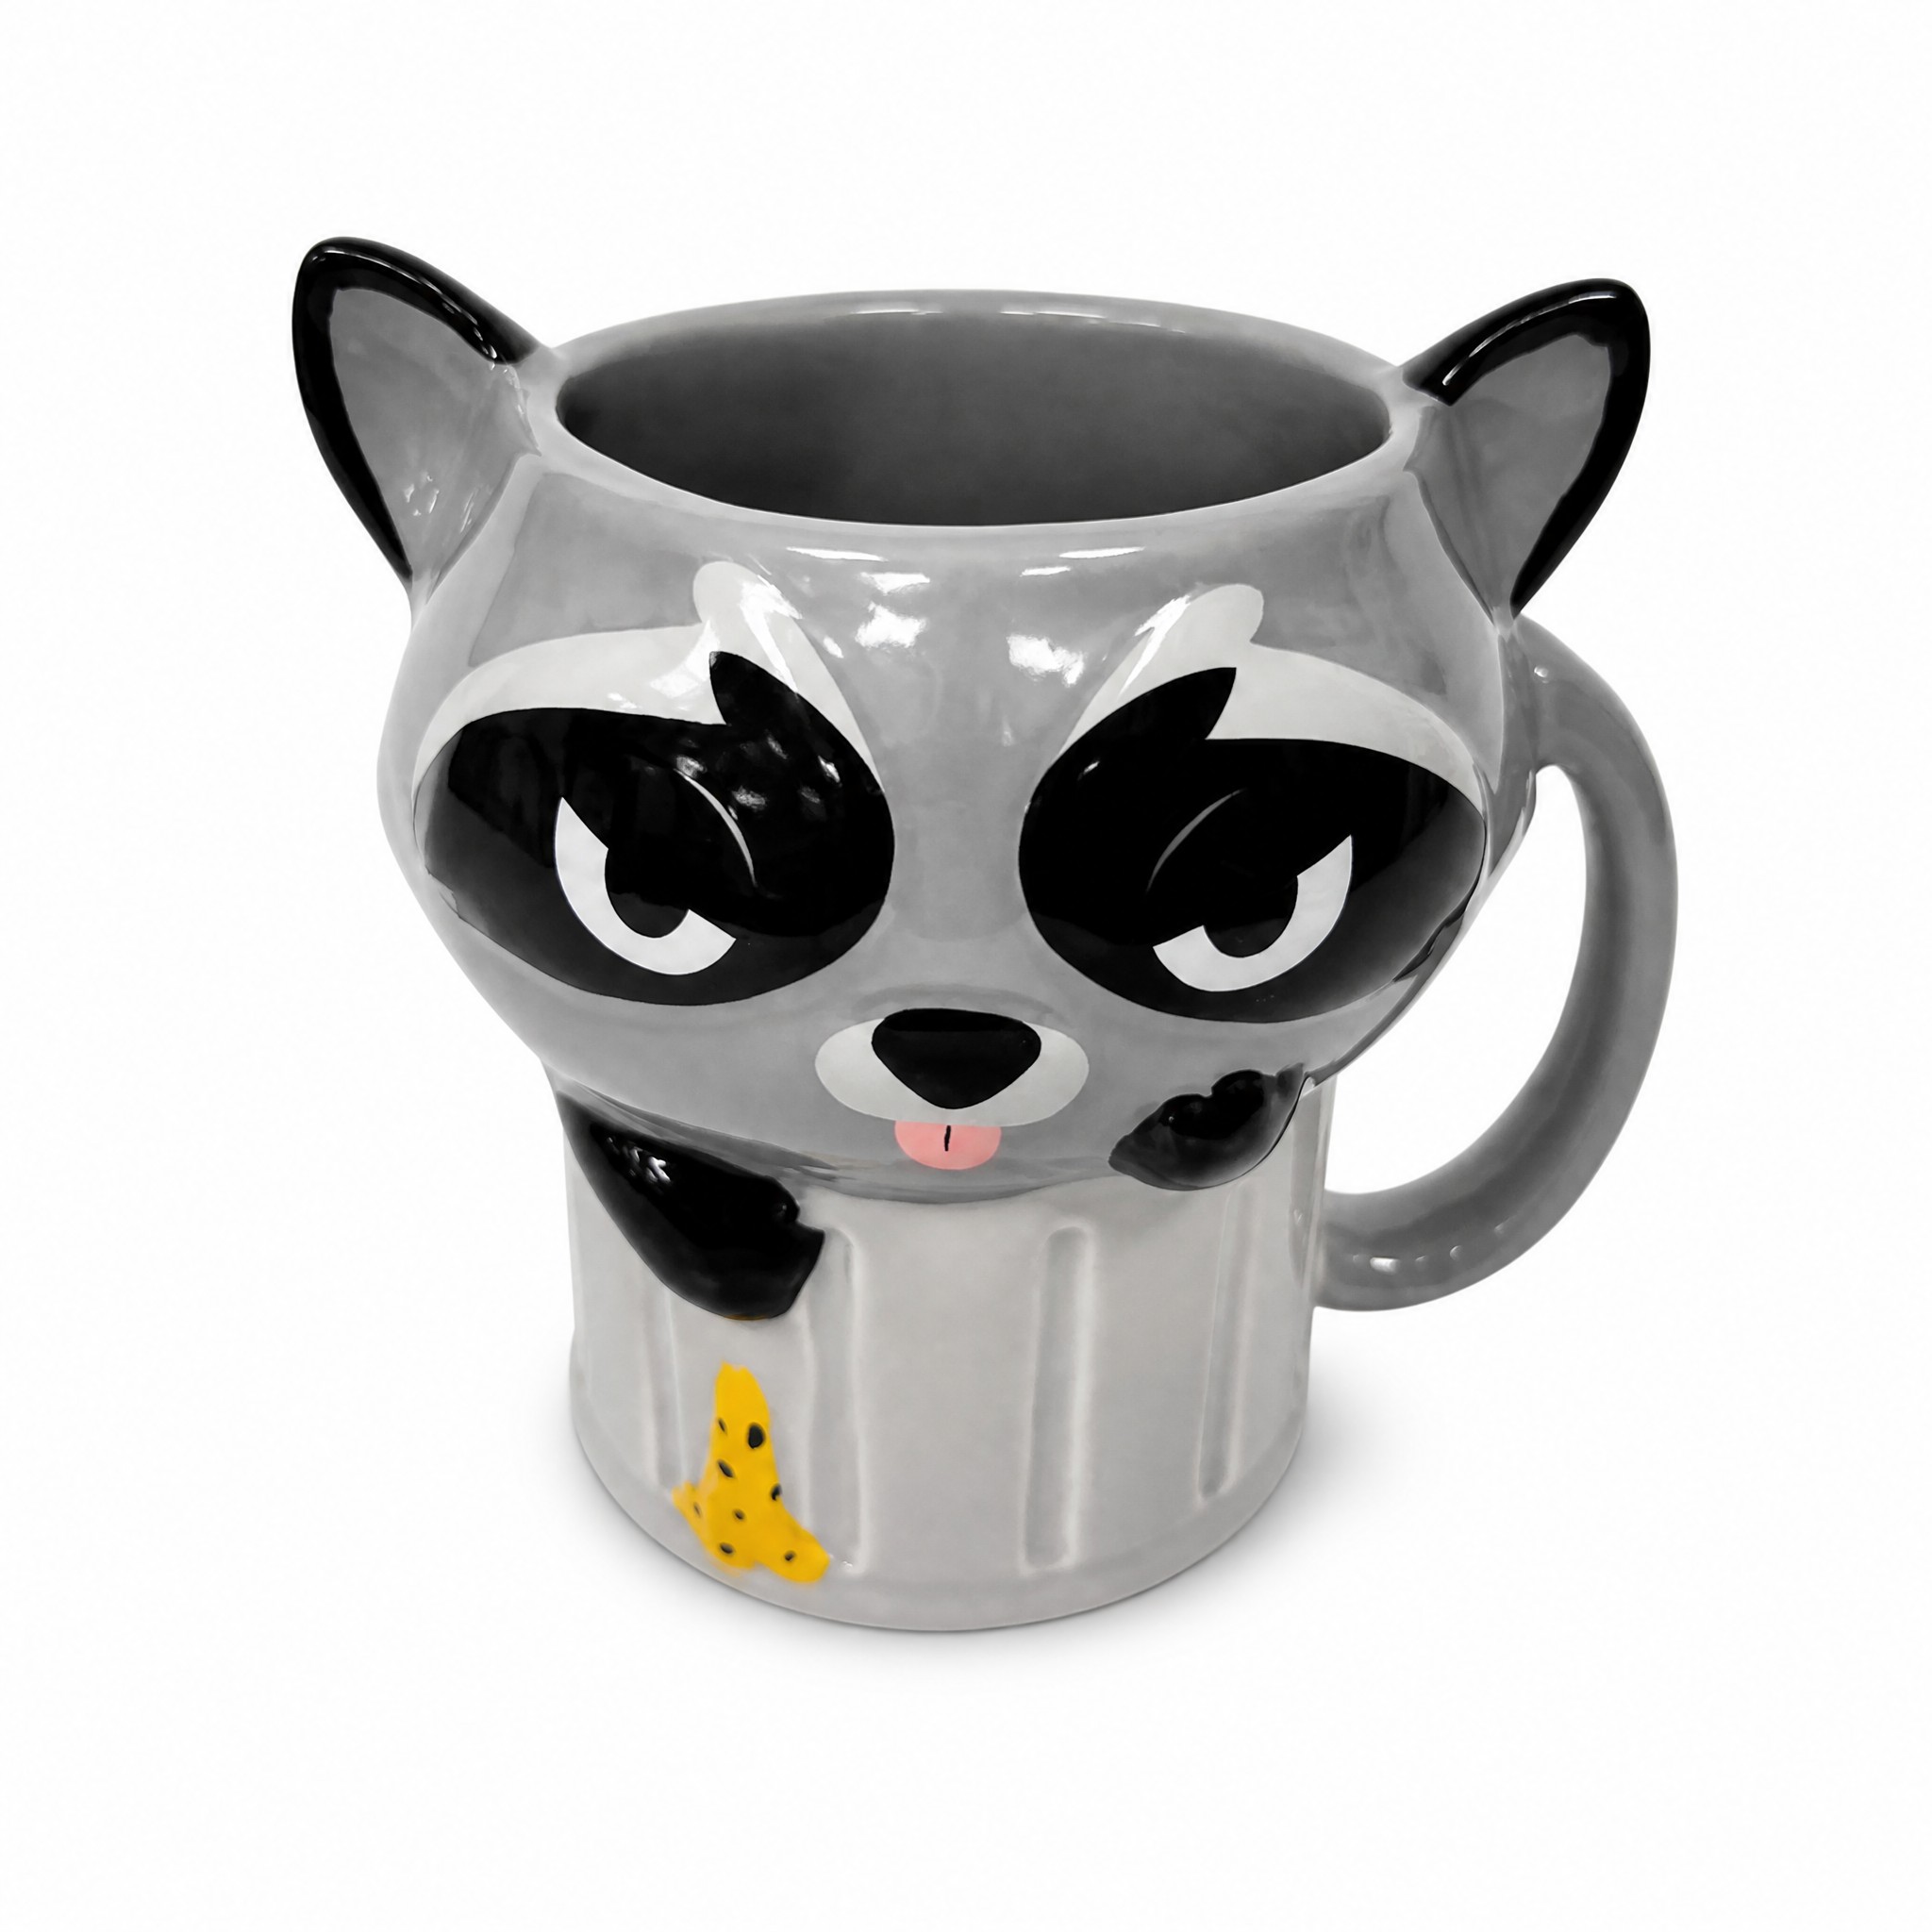
    If your design is a sculpted animal form — the kind of work we produce as a 3D sculptural cat & raccoon ceramic mug — slip casting is the only viable route and the CAD must be built for a 2–4 part mold from the first sketch. If it is a 350 ml round latte cup, roller forming will beat slip casting on unit price every time, but the model must be a clean solid of revolution with a separately designed handle.

    4. The Five Core Ceramic DFM Rules

    Rule 1 — Draft angle: 2°–3° minimum, inside and outside

    The green body is soft and wet when it leaves the mold; it has almost no green strength in shear. Apply a minimum of 2° per side on all vertical walls, and 3° on deep female cavities and cores (depth-to-width ratio above 1.5:1). Textured or relief surfaces need 3°–5° because the plaster grips mechanically. Zero-draft cosmetic walls are the number one cause of torn rims. For roller forming, the mold cavity draft can be smaller (1°–2°) because release is axial and assisted by the spinning motion.

    Rule 2 — Wall thickness: the 4.5–6.0 mm golden band

    Target 4.5 mm to 6.0 mm for the main body wall. Below 4.0 mm, slip casting becomes unreliable and the fired piece chips easily; above 7 mm, drying time doubles and the risk of differential-shrinkage cracking climbs steeply. Keep thickness variation under 2:1 across the part and blend every transition with a radius of at least 1.5–3 mm. A solid, heavy base is a design error: core it or step it, and never let a thick mass sit under a thin wall.

    Rule 3 — Parting line placement and undercut avoidance

    Place the parting line on the least visible plane, ideally a flat or a designed bead/groove that hides the seam. Two-piece molds handle single-axis undercuts only if the undercut is shallow and radiused; genuine re-entrant geometry requires a 3rd or 4th mold part, which raises tooling cost and cycle time — quantified in our ceramic OEM mold cost breakdown. Design snap features, barbed inserts and dovetail joints out of the green body; post-firing assembly or a silicone/wood add-on is cheaper than a 5-part plaster mold.

    Rule 4 — Hollow handles: drain hole and air vent are mandatory

    A hollow handle cast as part of the body needs a slip drain/return hole of 4–6 mm at the lowest point and an air-vent hole at the highest point, so slip can drain and air can escape without trapping a pocket. Trapped slip becomes a solid lump that cracks the handle at firing; a sealed void becomes a pressure vessel that blows out. Minimum internal cavity should be 5 mm across, walls 4–5 mm, and the drain hole must be positioned so it can be cleaned and, if required, plugged with a matching glaze-friendly detail.

    Rule 5 — Design mating features on the fired dimension

    Lids, threads, stacking rings, coaster recesses and silicone-lid grooves must be designed against the fired size and given ceramic-appropriate clearance: 0.8–1.5 mm radial clearance for a lid seat, and never a hard interference fit. Threads are possible but should be coarse (2–3 mm pitch) with rounded crests; fine threads will not survive 20% shrinkage scatter. Specify tolerances as ±0.5 mm or ±1.5% on critical fired dimensions, whichever is larger, and mark every critical dimension on the drawing.

    5. File Formats We Need for a Clean DFM Review

    Format Use it for Notes
    STEP / STP (AP214 or AP242) Primary deliverable Parametric solid, best for mold design, toolpath and CMM. One body per part; no surfaces-only shells; units declared in mm.
    IGES Legacy / compatibility Acceptable fallback when STEP export fails. Expect trimmed-surface gaps; we will heal them and report.
    STL Sculptural / relief review High resolution only: chord tolerance 0.01 mm, angular 5°. Watertight, manifold, single shell. Not accepted as the sole source for mold cutting.
    2D drawing (PDF / DWG) Inspection & approval Critical dimensions, fired target, tolerances, parting-line direction, gate and drain-hole callouts, glaze boundary.
    Not accepted — .skp, .obj, low-poly meshes, non-manifold or self-intersecting geometry, models already scaled without a stated factor, and files with no dimension reference.

    Send STEP plus drawing and we can usually complete the review without a single clarifying email, then move into master-mold cutting — the workflow we document in the anatomy of rapid ceramic prototyping: from 3D CAD to master mold in 7 days.

    6. Pre-Submission Self-Check

    • Draft angles: 2° minimum everywhere, 3° on deep cavities — verified.
    • Wall thickness 4.5–6.0 mm, no section ratio above 2:1, all transitions radiused.
    • Shrinkage factor applied (1.19–1.28), stated in the file name and on the drawing.
    • Parting line defined by you, not left to the mold maker.
    • Hollow handles: drain hole plus vent hole, no sealed volumes anywhere in the body.
    • Lids and mating parts checked at fired size with ceramic clearance.
    • Process selected deliberately: slip casting for sculpture and asymmetry, roller forming for axisymmetric volume.

    Send Us Your STEP File — Get a DFM Verdict in 24 Hours

    Upload your STEP, STL and drawing to our RFQ desk and our engineering team will return a written manufacturability assessment within one working day: draft-angle and wall-thickness audit, parting-line proposal, recommended process (slip casting vs. roller forming), shrinkage factor for your chosen body, mold part count, and a firm piece price with tooling separated out.

    Dehua Fugu Ceramics — source factory, not a trading company. In-house mold shop, in-house kilns at 1310°C, Low MOQ 500 pcs, full DFM support from first sketch to shipped pallet.

    Submit your 3D files for a 24-hour DFM review & quote →
    Or email drawings directly to [email protected] — we reply within one business day.
  • Ceramic OEM Mold Costs Explained: Tooling Fees, Working Molds & Batch Economics for Custom Mugs

    Ceramic OEM Mold Costs Explained: Tooling Fees, Working Molds & Batch Economics for Custom Mugs

    Every custom ceramic program starts with the same question from the buyer side: “Why does the tooling fee cost what it costs — and why can’t we just open one mold and run the whole order from it?” It is a fair question, and the honest answer is structural. A ceramic mold is not a steel injection mold that survives a million shots. It is a porous plaster working mold that is consumed by the very process it enables — so a ceramic factory must build a hierarchy of tooling before a single sellable mug exists.

    This guide breaks down exactly where a ceramic OEM mold fee goes: the three-tier tooling architecture, the four design variables that move the price most, real-world cost benchmarks for custom mugs and vessels, and how Dehua Fugu Ceramics structures mold fee refunds so that tooling becomes a recoverable investment rather than sunk cost.

    Key Takeaways

    • You never buy “one mold.” You buy a master model, a mother mold, and a set of consumable plaster working molds.
    • Plaster working molds die after roughly 60–80 slip casts. A 3,000-piece order may consume 40+ working molds, all pulled from the same mother mold.
    • Split-line count is the single biggest cost driver. A 2-piece mold and a 6-piece mold for the same volume can differ by 4x in tooling cost.
    • Tooling is refundable. Cumulative orders of 3,000–5,000 pcs return 100% of the mold fee at Fugu Ceramics. Low MOQ 500 pcs to start.

    What a Ceramic Mold Fee Actually Buys

    When a brand receives a quotation with a line item reading “mold fee: USD 850,” that number is not a single purchase. It is the sum of a short engineering supply chain that has to be built, tested, corrected and then duplicated. In practice the fee covers five cost centres:

    1. Engineering and DFM review — parting-line strategy, draft analysis, shrinkage compensation and wall-thickness normalisation on the buyer’s 3D file.
    2. Master model fabrication — CNC machining or resin printing of the positive master, hand-finished to a mirror surface because every defect is inherited downstream.
    3. Mother mold (block mold) production — the reusable silicone or plaster case mold that defines the geometry for all future working molds.
    4. Working mold set — the actual production plaster molds, multiplied by the number of split pieces and by the number of sets needed to run the batch.
    5. Sampling and iteration — first-article slip casting, bisque firing, glazing, 1310°C firing, shrinkage measurement and one round of correction.

    Understanding this stack is what allows a buyer to negotiate intelligently: the master model and mother mold are one-time, geometry-bound costs, while working molds are volume-bound consumables. A supplier quoting an unusually low tooling fee is almost always quoting a single working mold set with no mother mold — which means no replenishment when the molds wear out mid-order.

    The 3-Tier Tooling Architecture: Master Model, Mother Mold, Production Working Molds

    Ceramic slip casting is a destructive manufacturing method for the tool. Gypsum plaster absorbs water from the slip by capillary action; after every cast the mold must dry, and after every dry cycle it loses a fraction of its porosity and dimensional accuracy. The industry-standard service life of a plaster working mold is 60–80 slip casts before the cast surface starts to show dimpling, seam creep and shrinkage drift.

    That single fact dictates the entire tooling hierarchy:

    Tier What It Is Service Life Role in the Program
    Tier 1 — Master Model Positive replica of the mug, CNC-machined from tooling resin or cast from a printed pattern; hand-polished and scaled up for shrinkage. Permanent (stored, reusable) The legal definition of your product. Every future mold is a copy of this object.
    Tier 2 — Mother Mold Silicone or high-strength plaster block mold taken off the master, split along the same parting lines as production. 80–150 pulls The duplication tool. Lets the factory produce dozens of identical working molds without touching the master again.
    Tier 3 — Working Molds Plaster production molds poured from the mother mold, banded, keyed and dried — one set per split piece. 60–80 casts each The consumable. Replaced continuously across the production run.

    The arithmetic that buyers rarely see: a 5,000-piece order at an average of 70 casts per working mold requires roughly 72 mold sets. If the factory had tried to run that order from a single tool, the geometry would have drifted within the first week and the last 4,000 units would not match the first 500. The mother mold is what makes batch consistency possible — and its cost is why tooling cannot be priced like a disposable.

    It is also why reorders are cheap: on a repeat order the master model and mother mold already exist in the factory’s tooling store, so only the working mold set has to be re-poured. Most of our long-term clients pay a small replenishment fee, not a full tooling fee, on their second and third production runs.

    The Four Design Factors That Move Mold Cost Most

    Two mugs can hold the same 350 ml, weigh the same, and price 4x apart on tooling. The difference is always geometry. These are the four variables our engineers review first in a DFM assessment.

    1. Undercuts and split-line count (2-piece vs 4-piece vs 6-piece)

    Every surface that cannot be released along a straight pull direction requires an additional mold piece and an additional parting line. A plain tapered mug needs 2 pieces (body + base, or a two-part body shell). A mug with a fully integrated handle that loops back on itself needs 3–4 pieces. A sculptural vessel with recessed facial features needs 5–6 pieces, and each extra piece adds both tooling cost and a seam that must be fettled by hand before firing.

    A practical comparison from our own catalogue:

    • The mythological idol mask ceramic tiki mug is the high-complexity case. The mask face carries undercut eye sockets, a protruding brow ridge and a projecting nose — all of which sit off the vertical pull axis. This forces a 5-piece split with two side cores, and the parting lines must be routed through the natural shadow lines of the carving so they disappear after glazing.
    • The 3D frog flower ceramic mug sits in the mid-complexity band. The frog relief is a raised applique that reads as deep sculpture but releases cleanly in a 3-piece mold, because the relief depth stays under 6 mm and every edge carries a 3° draft. Same visual impact, roughly half the tooling cost.

    2. Deep relief and bas-relief carving depth

    Relief depth beyond about 8 mm starts to trap slip, create air pockets and tear at demold. Deep carving therefore requires larger draft angles (5–7° instead of 2–3°), thicker mold walls for structural support, and often a separate insert piece. As a rule of thumb, tooling cost rises roughly 15–25% for each additional 3 mm of relief depth once you pass the 6 mm mark.

    3. Integrated vs applied handles

    A one-piece cast handle is a marketing advantage and a tooling penalty. It requires a mold cavity that wraps the loop, extra keys, and careful drying control so the handle does not crack at the joint during the 1310°C firing. Applied (separately cast and slip-glued) handles use a simpler 2-piece body mold plus a small handle mold — cheaper tooling, but an extra hand-operation per piece and a visible joint line that must be blended. For volumes above 3,000 pcs, the integrated handle almost always wins on total landed cost even though its tooling line is higher.

    4. Wall-thickness uniformity and draft

    Slip casting rewards even wall thickness. A design with a 4 mm body wall stepping abruptly to 9 mm at a decorative band will dry unevenly, warp in the kiln, and produce a 10–15% reject rate that no mold can fix. Our DFM review normalises walls to a 4.5–6 mm band and adds transition radii, which sometimes requires editing the client’s CAD before the master model is machined. This step is free at quotation stage and saves far more than it costs — it is also where most “cheap” tooling quotes silently fail.

    Real Tooling Cost Benchmarks for Custom Mugs

    The table below reflects typical 2026 tooling ranges for stoneware and high-fire porcelain drinkware produced in Dehua, including master model, mother mold, working mold set and one sampling round. Figures are indicative and depend on final geometry, finish requirement and packaging.

    Mug Configuration Mold Fee (USD) Split Pieces Sampling Cycle Typical Use Case
    Standard straight-wall mug
    1 applied handle, no relief, single glaze
    350 – 600 2 7 – 10 days Cafe and retail private label
    Relief-handle / embossed logo mug
    Integrated handle, 3–6 mm relief, two-tone glaze
    550 – 900 3 10 – 14 days Brand merchandise, gift sets
    Multi-face 3D sculptural mug
    Tiki mask, animal relief, undercut features
    1,200 – 2,800 5 – 6 15 – 25 days Collectible, licensed IP, souvenir
    Lidded or non-round vessel
    Canister, teapot body, tapered tumbler
    900 – 1,800 3 – 5 14 – 20 days Homeware, coffee accessory kits

    All ranges assume client-supplied 3D data (STEP / IGES) or production-grade technical drawings. Tooling developed from reference photos alone carries an additional sculpting and reverse-engineering charge.

    Two observations buyers should take from this table. First, the jump from a 3-piece to a 5-piece mold is not linear — it is closer to 2.5x, because each extra piece multiplies fitting, keying and fettling labour. Second, sampling cycle length matters more than the fee itself: a 25-day sculptural tool sits in your critical path, so it should be launched the moment the design is frozen, not after packaging is approved.

    The Tooling Fee Refund Policy for Bulk Production

    Because tooling is a real cost and not a markup, the fairest structure for both sides is to make it conditional on volume. Dehua Fugu Ceramics operates a straightforward refund mechanism on custom mold programs:

    Mold Fee Return Schedule

    Cumulative order volume of 3,000 – 5,000 pcs: 100% of the mold fee is refunded as a credit against production invoices.

    The threshold is set by geometry: a 2-piece standard mug reaches full refund at 3,000 pcs, while a 5–6 piece sculptural tool reaches it at 5,000 pcs, because the tool consumes more working-mold replenishment cycles to get there.

    Volume can be accumulated across repeat orders within 24 months — it does not have to be a single purchase order. Entry MOQ is 500 pcs per SKU, per colorway.

    What this means commercially: on a typical USD 700 tool for a 2,500-pcs-per-year program, the tooling line fully amortises inside the first two production cycles. For a brand launching a seasonal SKU, the effective tooling cost per unit in year one is under USD 0.30 — which is usually less than the retail packaging.

    We recommend structuring the purchase order so the tooling fee is invoiced separately from goods. That keeps the refund clean, makes the amortisation visible in your COGS model, and gives your finance team a document that matches the credit note later.

    From 3D CAD to a Cut Mold: The Engineering Handoff

    Tooling cost is decided before the mold shop ever opens a file. The quality of the engineering handoff determines whether you pay for one master model or three. Our process compresses the loop from file receipt to master mold in seven working days, and the detail of that workflow is documented in The Anatomy of Rapid Ceramic Prototyping: From 3D CAD to Master Mold in 7 Days.

    The critical engineering step that most buyers underestimate is shrinkage compensation. A high-fire porcelain body fired at 1310°C contracts 12–14% linearly, while a mid-fire stoneware at 1200–1230°C contracts roughly 6–8%. If the master model is machined at nominal dimensions instead of scaled up by the correct factor, the finished mug arrives undersized — and the entire tool has to be rebuilt. The material decision therefore has to be locked before tooling, not after. We compare the two bodies, including their dimensional behaviour and thermal shock performance for cafe use, in High-Fire Porcelain 1310°C vs Mid-Fire Stoneware: What’s Best for Custom Cafe Mugs?

    The handoff checklist we ask every client to confirm before tooling release:

    • 3D file in STEP or IGES (mesh-only STL is workable but slows draft analysis)
    • Body material and target fired capacity in ml, with tolerance
    • Handle type (integrated / applied) and grip clearance
    • Glaze system and whether the mold needs a foot-ring relief for glaze pooling
    • Decorating method — pad print, decal, laser, or in-mold relief — since in-mold relief changes the split lines
    • Packaging drop-test standard, because it can force a wall-thickness increase

    Once those six items are fixed, the parting-line study, draft check and shrinkage scale can be completed in 48 hours, and the master model goes to machining with no ambiguity.

    Frequently Asked Questions

    Do I own the mold after paying the tooling fee?

    You own the design and the exclusive right to the geometry. Physical plaster molds are consumables and are retained in our tooling store so that we can replenish working molds for your reorders; masters and mother molds are kept for 24 months at no storage charge. Mold transfer to another factory is possible for the master model, but the working molds will not survive shipping.

    Can I reduce the tooling fee by simplifying the design?

    Yes, and it is usually the highest-leverage conversation in the project. Moving a 5-piece sculpt to a 3-piece relief typically saves 40–55% of the tooling cost and 8–10 days of lead time. Our DFM report always proposes a lower-tooling alternative alongside the as-drawn version so the trade-off is explicit.

    What happens if the sample does not match my design?

    One correction round is included in the quoted tooling fee. If the deviation is caused by our tooling or shrinkage scaling, the correction is at our cost. If it is caused by a design change after mold release, it is quoted as a modification.

    Is there a minimum order to start a mold program?

    Low MOQ 500 pcs per SKU for standard and relief mug configurations. Sculptural 5–6 piece tools are usually quoted at 1,000 pcs minimum because of working-mold economics.

    Conclusion

    A ceramic mold fee is not overhead — it is the engineering instrument that makes a repeatable, colour-consistent, dimensionally stable product possible. Once a buyer can see the three tiers, the four cost drivers and the point at which the fee is returned, the conversation shifts from “why is tooling so expensive” to “what is the fastest path to a refundable tool.” That is the conversation worth having.

    Free DFM Assessment — 24 Hours

    Send your 3D file, get a mold feasibility review and an exact tooling quote

    Upload a 3D STEP / IGES file or an AI vector drawing of your artwork. Our engineering team returns a parting-line study, draft and wall-thickness report, recommended split count, tooling price and a per-unit cost at your target volume — within one business day. No obligation, no cost.

    Low MOQ 500 pcs  ·  Mold fee 100% refunded at 3,000–5,000 pcs  ·  Dehua, Fujian, China

    Request Your DFM & Quote →    [email protected]

  • The Anatomy of Rapid Ceramic Prototyping: 3D CAD to Mold in 7 Days | Dehua Ceramic OEM Factory

    The Anatomy of Rapid Ceramic Prototyping: 3D CAD to Mold in 7 Days | Dehua Ceramic OEM Factory

    3D Peekaboo Frog Flower-Shaped Ceramic Mug - Complex 3D Relief Prototyping

    Most ceramic sourcing timelines are built around a single assumption: that a new shape cannot be sampled quickly. A traditional tooling cycle — sketch, hand-throw or hand-carve, plaster master, working mould, drying, bisque, glaze trial, second firing — commonly stretches across five to eight weeks, and any revision restarts a large part of the chain.

    That assumption is a workflow problem, not a physics problem. At Fugu Ceramics in Dehua we run a parallel-track prototyping cell in which the digital model, the shrinkage compensation, the mould set and the glaze trials move simultaneously rather than in sequence. The result is a vitrified, glazed, dishwasher-tested sample in the client’s hands in 7–10 working days, with the master mould already banked for production.

    This article walks through the four engineering stages that make that timeline possible.

    1. Digital 3D CAD & Shrinkage Rate Engineering (12–15%)

    The process starts with a parametric 3D model rather than a physical pattern. We accept STEP, IGES, Rhino, SolidWorks or STL files, and where a client supplies only a 2D drawing or a reference photo with key dimensions, our modelling team rebuilds the geometry parametrically so that wall thickness, rim radius, handle section and footring can be adjusted by parameter rather than by re-sculpting.

    The critical engineering step is shrinkage compensation. A Dehua porcelain body loses 12–15% of its linear dimension between the wet slip and the fired, vitrified state, and that loss is not uniform: it is the sum of drying shrinkage (roughly 3–5%), firing shrinkage (8–10%) and a small, geometry-dependent contribution from vitrification. Thin walls and long, unsupported spans shrink differently from thick sections and enclosed volumes, so a single global scale factor is not accurate enough for a production tool.

    We therefore scale the digital master per axis and per region, using measured shrinkage data from the specific body being specified — not a generic figure. The scaled model becomes the mould geometry, while the original model is retained as the target geometry. Every prototype is then scanned on a structured-light 3D scanner after firing and compared to the target in software, producing a colour deviation map. First-shot dimensional accuracy on a mug typically lands within ±0.5 mm on rim diameter and ±0.3 mm on height, which is well inside the tolerance that most retail buyers apply.

    Design for manufacture is reviewed at the same moment: minimum 2.5–3 mm wall at the rim, a handle section that can be cast without a trapped air pocket, a footring that will not distort on the kiln shelf, and a parting line placed where it can be finished invisibly. Catching these in CAD costs an hour; catching them in a master mould costs a week.

    2. Working Plaster Molds & Precision Slip Casting

    Once the scaled master is approved digitally, it is printed at high resolution in a dimensionally stable resin, hand-finished to a 0.2 mm surface tolerance, and used to cast the plaster block mould. Dehua’s plaster shop runs its own gypsum mixing and setting regime — water-to-plaster ratio, vacuum de-airing and set time are all controlled — because mould porosity governs how fast the slip layer builds and how cleanly the piece releases.

    For a typical mug we produce a two- or three-part working mould plus a separate handle mould. The first working mould is poured, cured and dried within 24–36 hours using accelerated drying rather than open-air curing, which is where a large part of the seven-day saving comes from.

    Slip casting itself is the precision step. The body slip is deflocculated, viscosity- and specific-gravity-controlled (typically 1.75–1.80 g/cm³ for porcelain), and cast to a measured wall thickness rather than to a fixed dwell time — because the same dwell produces different thicknesses on a cold mould versus a warm one. The cast piece is released at leather-hard stage, the handle is joined with fresh slip and hand-blended, the footring is turned, and the piece is dried under controlled humidity to prevent the differential shrinkage that causes warping and rim cracks.

    Because the working mould is derived from the same compensated CAD geometry as the eventual production tool, the prototype is not a “close approximation” — it is dimensionally the production part. What the client approves is what the factory will run.

    Intricate 3D relief and debossed geometry is where the compensated master earns its keep. An undercut-free relief — an animal’s snout in the round, or a debossed hop cone pressed into a stein wall — has to be drafted so the plaster releases cleanly, then scaled per region so the relief still reads at the same depth after 12–15% shrinkage. You can see the result on the 3D Peekaboo Frog Flower-Shaped Ceramic Mug, where the flower-shaped rim and the frog relief are cast as one piece rather than assembled, and on the Classic Oktoberfest Debossed Ceramic Beer Stein Mug, where the debossed hop-and-barley band holds a crisp edge at 500 ml production scale. Both belong to the same family of dimensional work we run for tiki and novelty barware, where deep relief is the entire product.

    3. First-Firing Test Kilns & Thermal Tolerance

    Prototypes are bisque-fired and then glaze-fired to 1310°C in a dedicated test kiln with a short, tightly controlled cycle, so that a glaze result is available in 24–36 hours rather than waiting for a full production car. The test kiln is profiled to match the production tunnel kiln’s time-temperature curve as closely as possible, which matters because glaze maturity, colour development and body vitrification are all functions of heat work, not peak temperature alone.

    Each prototype is then checked against four thermal and mechanical criteria:

    Thermal shock resistance. A fired sample is cycled between boiling water and ice water. A properly vitrified porcelain body at 1310°C should survive a differential of 130–140°C without crack initiation; anything that fails this check indicates either an under-fired body or a glaze whose coefficient of expansion is mismatched to the body.

    Glaze fit. Crazing and shivering are both expansion-mismatch failures — one where the glaze is in tension, one where it is in compression. We read fit visually under magnification immediately after firing and again after 24 hours, since some mismatch only appears as the piece relaxes.

    Dishwasher endurance. Samples go through an accelerated commercial cycle test to confirm no weight gain, no colour shift and no glaze breakdown. For a high-fire porcelain body below 0.2% water absorption, the expected result is no measurable change across 500 cycles.

    Chip and impact resistance. Rim and handle are impact-tested, because a handle that survives firing but fails in a café is a warranty problem, not an aesthetic one.

    Where a trial fails, the correction is made in the glaze or the firing profile and re-fired the next day — the digital geometry does not need to be reopened, which is why revisions inside the 7–10 day window are realistic rather than aspirational.

    4. Streamlined Sampling for Global Retailers & Kickstarters

    For a retailer or an e-commerce brand, the commercial risk in a new ceramic line is not the tooling cost — it is the calendar. A shape that slips by three weeks can miss a container booking, a seasonal window or a crowdfunding delivery promise.

    Our sampling workflow is built around that risk:

    Digital approval before physical tooling. The compensated 3D model, wall-thickness section and rendering are signed off remotely, so no plaster is poured against a shape the buyer has not seen. This removes the most expensive kind of revision.

    One mould, multiple decorations. Because the working mould is banked after first approval, colourways, decals, reactive glazes and logo treatments can be trialled on the same geometry in parallel rather than serially. A five-colour range is five glaze trials, not five tooling cycles.

    Photograph-ready first shots. Prototypes are supplied finished and glazed, so they can go straight to a photographer, a trade show or a crowdfunding campaign page without a second round of samples.

    Tooling continuity into production. The master and working moulds from the prototyping cell transfer directly to the production line, so the approved prototype and the shipped production run share the same geometry and the same glaze recipe. No “sample-to-production drift.”

    Typical deliverables at day 7–10: one to three glazed prototypes, a dimensional report against the target CAD, a glaze trial record with L*a*b* values, water-absorption test data, and a production quotation with MOQ and lead time.

    Related Products

    Geometry that survives the mould

    Both pieces below started as a compensated 3D master and went from CAD to a glazed first shot inside the 7–10 day window described above — same master, same working mould, same glazes carried into production.

    3D Peekaboo Frog Flower-Shaped Ceramic Mug

    3D Peekaboo Frog Flower-Shaped Ceramic Mug (330ml / 11oz)

    330 ml / 11 oz. Flower-shaped rim and frog relief cast as a single piece from one working mould, glaze-fired to 1310°C.

    View product details

    Classic Oktoberfest Debossed Ceramic Beer Stein Mug

    Classic Oktoberfest Debossed Ceramic Beer Stein Mug (500ml / 17oz)

    500 ml / 17 oz. Debossed hop-and-barley band with a crisp, drafted edge that releases cleanly and holds detail in production.

    View product details

    Explore the tiki & novelty barware collection →

    Start With a Model, Not a Mould

    Rapid prototyping in ceramics is not about firing faster — kilns are already fast. It is about removing the serial dependencies between geometry, tooling and glaze, so that all three develop in parallel against a single compensated digital master. That is the whole method, and it is why a 7-day sample and a production-accurate master mould are not in conflict.

    Have a shape in CAD, or just a sketch and a target capacity? Send the file or the drawing along with your intended glaze direction and annual volume, and our Dehua engineering team will return a shrinkage and tolerance plan plus a prototyping schedule within two business days. Contact Fugu Ceramics to begin your prototype.

  • High-Fire Porcelain (1310°C) vs. Mid-Fire Stoneware: What’s Best for Custom Cafe Mugs?

    High-Fire Porcelain (1310°C) vs. Mid-Fire Stoneware: What’s Best for Custom Cafe Mugs?

    3D Peekaboo Hippo Ceramic Coffee Mug - High-Fire Porcelain 1310°C

    Every specialty coffee roaster eventually faces the same specification question: should the custom mug that carries the brand be high-fire porcelain fired to 1310°C, or mid-fire stoneware fired in the 1180–1220°C range? Both are vitrified ceramics. Both can be printed, glazed and branded. But they behave very differently after eighteen months of commercial dishwashing, daily thermal cycling and the kind of handling that only happens in a busy café.

    This article breaks the decision down on the four criteria that actually matter to a coffee brand: vitrification science, water absorption and dishwasher durability, glaze chemistry for Pantone-accurate colour matching, and the raw material base — specifically why Dehua kaolin clay performs the way it does.

    1. The Science of Vitrification at 1310°C

    Vitrification is the process by which a ceramic body densifies as glassy phase forms between the clay particles. At 1310°C, the silica–alumina system in a porcelain body melts far enough to close open porosity almost completely, while the mullite needle network — the crystalline skeleton that gives porcelain its strength and translucency — continues to grow. The result is a body that is dense, dimensionally stable and optically warm: light passes through a 3–4 mm wall.

    Mid-fire stoneware sits at a different point on the same curve. At 1180–1220°C the body sinters and becomes functionally vitrified, but a small volume of open porosity survives. Because stoneware bodies are formulated with more iron-bearing plastic clays and less pure kaolin, they fire to a warmer, more opaque colour and a slightly softer surface. That is a desirable aesthetic — it reads as handcrafted — but it is a different engineering outcome.

    Practically, the 1310°C firing gives the moulding shop three advantages: a tighter fired-dimensional tolerance (typically ±0.5% on a 90 mm rim), a harder body that resists rim chipping during transport, and a fully sealed surface that does not require a post-firing sealant. For a brand shipping pallets to distributors, those three factors translate directly into lower breakage claims and fewer dimensional disputes.

    2. Water Absorption & Commercial Dishwasher Durability (<0.2%)

    Water absorption is the single most predictive number for long-term performance in a food-service environment. ISO 13006 classifies porcelain as having water absorption of 0.5% or less; a well-controlled 1310°C Dehua porcelain body routinely tests below 0.2%, and our production batches are sampled and recorded per kiln car.

    Why does 0.2% matter more than 0.5%? Because absorption is not a static property. Each commercial dishwasher cycle — typically 60–90°C wash, a cold rinse, and a hot dry — drives a thermal shock of 40–60°C through the wall section, then re-saturates any open pore network. A body at 0.5% absorption gradually draws moisture into the interface between body and glaze. Over hundreds of cycles that moisture expands on heating, fatigues the glaze bond, and eventually produces the two failure modes cafés complain about most: crazing (a fine crackle in the glaze) and rim staining that cannot be washed out.

    Below 0.2%, the pore network is effectively closed. Independent cycle testing on our high-fire porcelain mugs — 500 cycles in a commercial conveyor dishwasher at 70°C wash / 85°C rinse — shows no measurable weight gain, no glaze crazing and no loss of colour density. Mid-fire stoneware of good quality will usually survive the same test, but the margin is thinner, and the body remains more sensitive to detergent chemistry and to abrupt cooling.

    There is also a thermal-shock dimension. A dense porcelain body tolerates a rapid temperature differential of roughly 130–140°C without stress cracking, which covers everything from a boiling Americano to an iced latte in the same vessel. Stoneware generally sits nearer 100–110°C, which is adequate in normal use but leaves less headroom for abuse.

    That same margin is what lets us keep decorative detail on a working mug instead of flattening it for durability. The wall relief on tactile custom pieces like our 3D Peekaboo Hippo Ceramic Coffee Mug sits on a sub-0.2% absorption body, so the sculpted hippo survives the same commercial wash cycle as a plain café mug — and the glaze over it holds colour density because there is no porosity opening under the decoration. Every piece in our custom drinkware collection is specified on those two numbers first, aesthetics second.

    3. Glaze Chemistry & Pantone Matching for Specialty Coffee Roasters

    Brand colour is where the two bodies diverge most visibly. A glaze is a thin glass; its fired colour depends on the base glaze chemistry, the firing atmosphere and the colour of the body underneath. On a bright, low-iron porcelain at 1310°C, a small addition of cobalt, copper or a stain pigment reads cleanly and consistently — which is why packaging-grade colour matching is achievable.

    At Fugu Ceramics we match to Pantone references using a two-step process. First, a spectrophotometer reading (D65, 8° observer) is taken from the client’s approved physical reference or Pantone chip and converted into a target L*a*b* value. Second, a ladder of glaze trials is fired on the actual production body, because the same glaze over a white porcelain and over an iron-bearing stoneware will land on different L* values — often 3–5 points apart, which is clearly visible side by side.

    Because 1310°C porcelain is low in iron and fires to a neutral white, the delta between trials is small and repeatable, and we can hold a ΔE of under 1.5 between production lots. On mid-fire stoneware, the iron content and the reduction-sensitive clays introduce lot-to-lot variation that must be absorbed by the glaze, narrowing the achievable colour space and making exact brand matches harder to guarantee over repeat orders.

    Reactive and speckled glaze effects, incidentally, are a legitimate reason to choose stoneware — the iron in the body blooms through a translucent glaze and produces the mottled look many third-wave roasters want. If the brand direction is a clean, saturated, precise colour, porcelain is the more controllable substrate.

    4. Why Dehua Kaolin Clay Makes the Difference

    Dehua, in Fujian Province, has been a porcelain centre since the Song dynasty, and the reason is geological. Local kaolin is exceptionally low in iron and titanium, with a high alumina content and a narrow particle-size distribution. Low iron means a whiter fired body and no grey cast under a clear glaze; high alumina means the body holds its shape through 1310°C without slumping; a tight particle distribution means the slip casts evenly and the fired shrinkage is predictable.

    That last point is the one that shows up in production data. Dehua kaolin bodies in our mould shop hold a total shrinkage of 12–15% with a repeatability of about ±0.3%, which is what makes a master mould reusable for tens of thousands of pieces without dimensional drift. It also allows us to design walls to 3 mm in the rim and 4–5 mm at the base — thin enough to feel refined, thick enough to survive a commercial dishwasher and a busy pass.

    The material also matters for food-contact compliance. Our high-fire porcelain is formulated without lead or cadmium in the glaze and is tested to FDA 21 CFR 175.300 and California Proposition 65 limits, with EU 1935/2004 and German LFGB migration testing available on request. Dense, low-absorption porcelain passes these tests with a wider margin than a more porous body, because there is no pore network to trap residue and release it later.


    Featured Custom Ceramic Pieces

    High-fire porcelain, seen in the hand

    Every piece below is slip-cast, glazed and fired to 1310°C in our Dehua workshop — the same body and the same glaze lab described above.

    3D Peekaboo Hippo Ceramic Coffee Mug in high-fire Dehua porcelain

    3D Peekaboo Hippo Ceramic Coffee Mug (330ml / 11oz)

    330 ml / 11 oz, 1310°C high-fire porcelain, water absorption below 0.2%. A tactile 3D hippo relief sits on the wall of an otherwise clean, café-spec mug — under-glaze sculpture and Pantone-accurate colour on the same vitrified body.

    View product details  Browse the drinkware collection →

    Which Should You Specify?

    If the priority is a precise brand colour, a refined thin wall, translucency, and the longest possible service life in a commercial dishwasher, specify 1310°C high-fire porcelain. If the priority is a rustic, iron-speckled, hand-thrown aesthetic and the mugs will live mainly in a retail or home environment, mid-fire stoneware is the honest choice.

    Most specialty coffee brands that come to us end up with porcelain for the café and wholesale line, and stoneware for a limited seasonal release — which is usually the correct commercial answer, because the two bodies serve two different jobs.

    Ready to specify your next custom mug programme? Send us your target capacity, wall thickness, Pantone reference and expected annual volume, and our Dehua engineering team will return a glaze trial plan, a shrinkage and tolerance sheet, and a quotation within two business days. Contact Fugu Ceramics to start your sample.

WhatsApp Us